Have you ever visited Winterthur in Delaware? Winterthur is the former childhood home of Henry Francis DuPont and is now a museum specializing in American decorative arts. It also has a collection of quilts. If you are
traveling north it is well worth a stop at Winterthur. It has spectacular gardens as well as
the house and furnishings available for touring.

 Once again I
wasn’t able to find a name for this month’s block in the old quilt source I found the pattern in,
American Patchwork Quilts by Lenice Ingram Bacon, copyright 1973. Below are two colorations. The one on the left, the antique block
from the early 1800s, shows wonderful use of stripes by the maker, a master
quilter. The one on the right is a different coloration from a recent magazine, "Sampler Quilts & Blocks" by Fons and Porter. In that magazine it is called
Triangle Squares. A slightly different coloration is shown in Barbara
Brackman’s Encyclopedia of Pieced
Quilt Patterns that is also called Triangle Squares.
Once again I
wasn’t able to find a name for this month’s block in the old quilt source I found the pattern in,
American Patchwork Quilts by Lenice Ingram Bacon, copyright 1973. Below are two colorations. The one on the left, the antique block
from the early 1800s, shows wonderful use of stripes by the maker, a master
quilter. The one on the right is a different coloration from a recent magazine, "Sampler Quilts & Blocks" by Fons and Porter. In that magazine it is called
Triangle Squares. A slightly different coloration is shown in Barbara
Brackman’s Encyclopedia of Pieced
Quilt Patterns that is also called Triangle Squares.
For mine,
I used 3 fabrics: a dark, medium and light. Changing the color values changes the look of the block as
shown by these two examples.
As I was making this block
I auditioned fabrics for the corners as well as reviewed the other blocks I had
made to determine whether I wanted the block to be more dark or more light. I
decided my quilt needed more lights.

Cutting:
Cut – 8 – 2
3/4” squares used on the wings of the flying geese unit (dark fabric) mark a diagonal line on
the back of each square.
Cut – 4 – 2
3/4” x 5” rectangles for the inside of the geese unit (medium )
Cut – 2 – 3 1/8” squares cut in half diagonally to put
the center block on point (dark)
Cut – 4 – 2 3/4” squares for the
corners (light)
Cut – 1 – 3 5/8” square (light)
Sewing:
Make the flying geese units by placing a square on the rectangle
unit right sides together and then sew on the line. Trim and then iron the square back. Repeat with the other square on the
other side. Make four flying geese units. Each unit should measure 5” x 2 ¾”.

 Mark the center
of each side of the 3 5/8” square.
Mark the middle of the long side of each triangle. Center the long side of the triangle on
a side of the square Repeat on the opposite side of the square. Stitch both
sides. Trim the excess triangle edges off.
Mark the center
of each side of the 3 5/8” square.
Mark the middle of the long side of each triangle. Center the long side of the triangle on
a side of the square Repeat on the opposite side of the square. Stitch both
sides. Trim the excess triangle edges off.
Iron toward the dark.
Repeat with the other two triangles. Iron toward the light.
This unit should measure 5” x 5”.
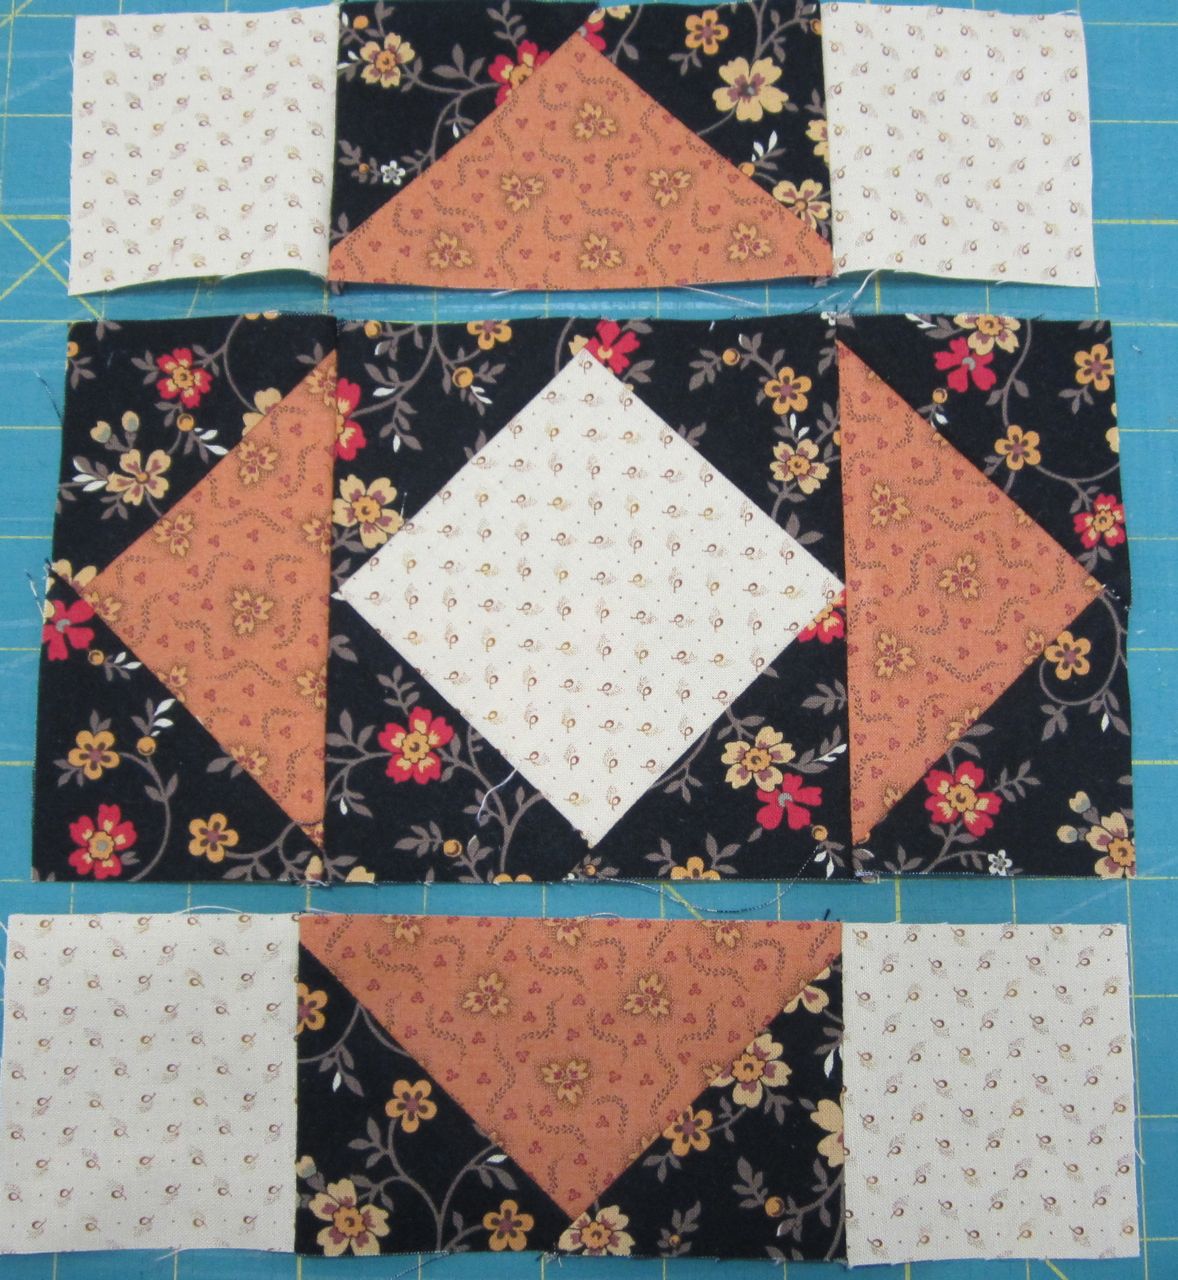
Layout the block as shown. Sew into rows. Iron the top and bottom row toward the
center. Iron the middle row to the
flying geese units. Sew the rows
together. This block is done.
Next month we will be making the last block. If you have decided not to make the
Tree of Life block consider going to Quilter’s Cache and use some of the 9”
finished blocks to make 4 additional blocks for the center. www.quilterscache.com

 Mark the center of both the block and the long side of the
triangle just like we did for the center square of this block. Sew these two opposite sides. (Yes, you need to match the edges of
each piece even though it looks like I’m offsetting the triangle and the block
below. I was trying to show the
two pins marking the center of each piece but you can hardly see the red ball
pin.) Iron the seam toward the triangles.
Repeat with the other pieces.
I also ironed that toward the triangles although I might change it
before adding the coping strip.
Mark the center of both the block and the long side of the
triangle just like we did for the center square of this block. Sew these two opposite sides. (Yes, you need to match the edges of
each piece even though it looks like I’m offsetting the triangle and the block
below. I was trying to show the
two pins marking the center of each piece but you can hardly see the red ball
pin.) Iron the seam toward the triangles.
Repeat with the other pieces.
I also ironed that toward the triangles although I might change it
before adding the coping strip.
I recently found an app for smart phones or iPads that did the
math for me. It is called Quilt
Calc from Robert Kaufman. Some of
what it calculates is finding backing and batting yardage from the size of the
top, the number of certain size pieces that can be cut from a given size of
fabric, size of square needed to set another square in a square in a square
setting and other info. And, best
of all it is free. Look for it at
the iTunes App Store for Apple devices and Android Apps on Google Play. (Hope the last one is right, I am an
Apple person so I’m taking this info directly from a Google search.)
If your center block is substantially different from 9 ½”
unfinished you should use this app to determine your setting blocks. Note it asks for the finished size of
the block, not the unfinished size.
Next month we’ll be adding a coping strip to our tree of life unit
to make sure it fits with all of our blocks. Below is a picture of a possible way to plan a coping
strip. I’ll be adding a strip of
fabric rather than a strip of blocks as shown. Unless I decide to go slightly crazy!
Here's what the whole quilt looks like now. Next month I'll present the last block and how to figure your own coping strip. I am sure I'll be putting border/s of some sort on this quilt but I'm not sure what it will be yet. The November block will be the end of this quilt.


Happy quilting all!
Looks good! I'd like to make this in a more modern color palette sometime. Add it to my list of things to do in the sewing room. :-)
ReplyDeleteAnother great block - thanks for the tutorial.
ReplyDeleteYour blocks look wonderful together.