Are you a fan of RSC, Rainbow Scrap Challenge? I seem to participate every other year or so. Although I spend some time nearly every day in my studio I am not a particularly fast planner or doer when it comes to making quilts and such. So some years I'm all about finishing projects or working on things I want to do. But some years I like to add the RSC as a form of using more scraps. Instead of doing several different block sets each month, I've joined Table Scraps Challenge at The Joyful Quilter. Ok, yes I did start one new block set with January's pink that I plan to continue.
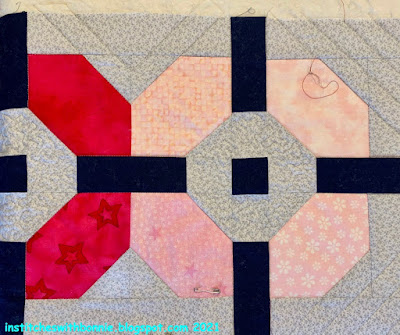
But first up is my Table Scraps Challenge runner. I realize I don't have a lot of pink but did have some fat quarters I really like. I have a couple of table runner books and books I know have table runners in them. Plus, I have files of quilt pictures on my computer. I looked at all of them until I chose Fusion from The Trendy Table by Heather Peterson of Anka's Treasures. (Wow! I just realized she's written two more Trendy Tables books.)
I decided I wasn't going to use just pink so I selected a light grey allover design and Navy Kona solid. I was going to make it smaller to fit my dining room table. I got to cutting. Have I mentioned I don't always read directions completely? First, I had to figured out the right size and quantity to cut my pieces. Then I had to sew them the right way. (Really? Why?) Which led me to having to rip frequently. Oh yes, there was a whole post recently on Jack the Ripper. This table runner was helped by my friend Jack. I digress.
 |
| Stitching in the ditch. |
 |
| Straight line quilting done with 1" painter's tape markings. |
Because the straight lines went off the edge of the table runner, I was able to run my stitching off and then make a turn and stitch in the excess until batting until I wanted to make a turn and stitch the next straight line area. That made it much easier as long as I thought about stitching before starting. And yes, my pointer finger was tracing the lines to make sure I figured out what to do before the machine did its work.
The final stitching was a curve in the pink pieces. Again, I thought about the best way to do it to eliminate starts and stops. Having the navy separating parts of the quilt meant I did have quite a few beginnings and endings. I did not stitch in the navy at all. I used a bendable ruler to create a pleasing curve and then drew it on a piece of lightweight cardboard. I cut it out and had two shapes I could play with. I used it to draw a line on the pink pieces to give some motion to the quilting.
As I was quilting I was pondering the binding. I had enough grey or navy to do it. I probably had enough of one of the light pinks to use as a binding too. But after consulting with my quilting buddy Sharon, we both liked the idea of the navy. (Thank goodness I had enough for it and another quilt I wanted to bind with it!)
I don't often hand stitch binding down any more. Most of my quilts are donated. The last thing a recipient wants is the binding to fall apart so I normally sew both sides on the machine. But this was small and I was willing to spend the time to hand finish it. I LOVE the backing fabric. I've owned it for years and have used little bits and pieces but I thought it worked well with the front.It looks mostly cranberry but it has a bit of pink within the paisleys. And if I want, I can flip the runner and use that side for a while.


